
A sewer line doesn’t just fail. It fails in stages, quietly, while the visible symptoms lag behind the damage occurring underground by weeks or months. Most of the time, by the time a homeowner notices something is wrong, the pipe has already cracked, shifted, or been infiltrated by roots long enough for the wastewater to start pooling somewhere it shouldn’t. Left unaddressed, that buildup doesn’t stall; it escalates into sewage backing into the home, saturated soil around the foundation, and repair work that’s far more invasive than it would have been if caught early.
Herdman Plumbing Heating & Cooling exists precisely for that window before things get worse, using diagnostic and repair methods built to catch and fix the problem without tearing the property apart.
In this blog, we walk you through what actually happens during a trenchless repair from the first camera pass through the pipe all the way to the final pressure test. We’ll look at the two main types of trenchless, what determines what gets used, and what you can expect for your yard and your timeline.
How Do You Know You Need Sewer Repair in the First Place?
Sewer problems usually show up as a series of unrelated annoyances before anyone ties them together as the result of the same cause. The key to avoiding a fixable issue turning into a full excavation is to recognize the pattern early on.
Signs Inside the House
- Multiple drains running slow at the same time, not just one fixture.
- Gurgling sounds from toilets or tubs after running water elsewhere.
- Sewage odor drifting from drains that doesn’t clear with cleaning.
Signs Outside in the Yard
- Unexplained soggy or spongy patches, especially near the sewer line’s path.
- A noticeably greener strip of grass running in a line across the yard.
- Sewage smell outdoors with no obvious source.
These are the most obvious signs that you need sewer repair, and none of these will fix themselves. Ignoring them means a full backup later, and the cleanup and health risk of raw sewage inside a home.
What “Trenchless” Actually Means
Traditional sewer repair means digging a continuous trench along the entire damaged section, which tears up lawns, driveways, and sometimes hardscaping just to expose a few feet of pipe. Trenchless repair replaces that with a small number of access points, working through the existing line rather than around it.
A repair that used to mean losing your yard for a week now frequently means one or two small holes and one afternoon.
Step 1: Diagnosing the Problem With Camera Inspection
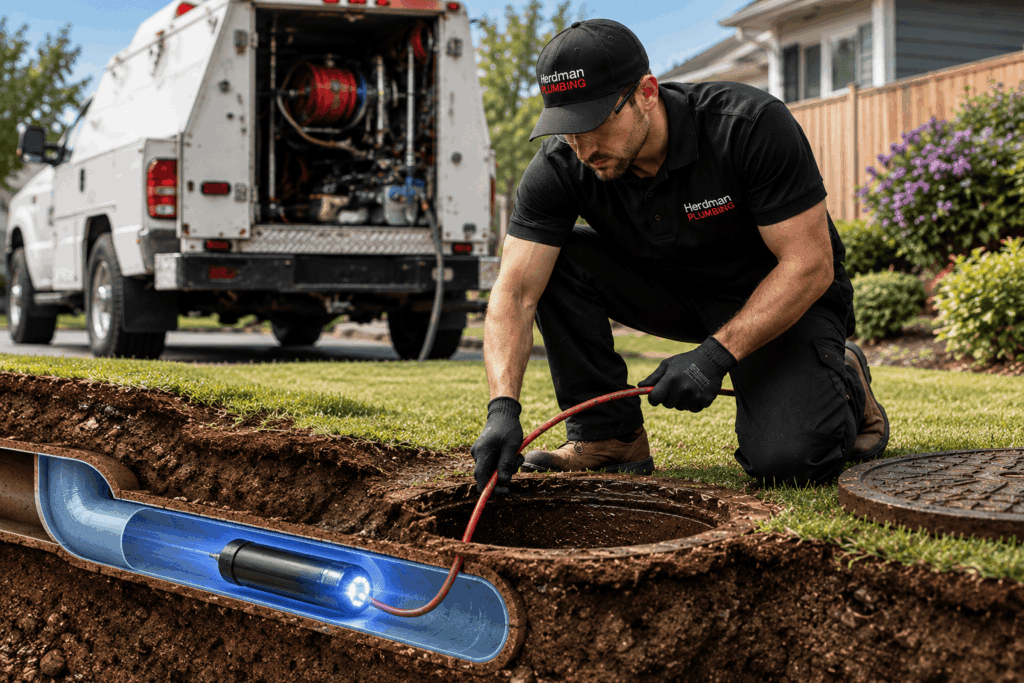
Every job starts with a high-resolution camera going straight into the line. This isn’t a preliminary glance; it’s how our technicians identify the exact location, size, and cause of the damage, whether it’s a hairline crack, a root mass, or a fully collapsed section, before determining a repair method.
Step 2: Locating Access Points Without Digging Up Your Yard
Once the damage is mapped out, we determine the fewest number of points of entry to access the damage. Usually an existing cleanout or one small opening at either end of the affected section. This targeted approach is what makes sewer line replacement without digging a full trench actually possible, and it’s the step that determines how much of your landscaping stays untouched.
Step 3: Pipe Bursting: Replacing the Line in Place
When a pipe is too compromised to repair internally- collapsed sections, severe corrosion, or extensive root damage- pipe bursting replaces it entirely without opening a trench.
Static Pipe Bursting
A bursting head is winched through the old pipe, cracking it outward while pulling a new pipe in directly behind it along the same path.
Pneumatic Pipe Bursting
Instead of pulling the bursting head forward, a pneumatic hammer drives it forward. This is often used if the old pipe is unusually brittle or hard to break using tension alone.
Either way, you get a full replacement line that matches or exceeds the original size without the yard-long excavation required for traditional replacement.
| Factor | Pipe Bursting | Pipe Lining (CIPP) |
| Best for | Collapsed or severely damaged pipe | Cracked but structurally sound pipe |
| What happens to the old pipe | Fractured and replaced | Reinforced from within, left in place |
| Access points needed | One at each end of the section | Often just one |
| Resulting pipe diameter | Matches or slightly increases | Stays the same or slightly reduces |
Deciding between pipe bursting vs pipe lining always comes back to what the camera inspection shows; the condition of the existing pipe dictates which method actually applies.
Step 4: Pipe Lining (CIPP): Repairing Without Replacing
Pulling out a pipe that’s still structurally fine just because part of it is cracked doesn’t make much sense, so when the damage allows for it, we fix the line from the inside instead. The process starts with a felt liner soaked in resin, which gets fed through the access point and pushed against the walls of the damaged section until it’s sitting flush all the way around. From there, it needs to cure: hot water, steam, or UV light, depending on which resin we’re working with, though UV tends to get the job done quicker than the other two. Once it hardens, you’ve essentially got a new pipe molded inside the old one: no seams, no gaps for roots to sneak back through, and full flow restored without ever touching what was already buried there. That’s the core idea behind cured-in-place pipe (CIPP) lining: repair the pipe you have rather than replace it.
Step 5: Testing and Confirming the Repair Worked
The job isn’t finished once the new pipe or liner is in. A second camera pass confirms the repair is properly sealed and free of defects, followed by a water flow test to verify wastewater moves through at the rate it should. Skipping this step is how minor issues- a loose seal, an improperly cured section- turn into repeat failures within months.
What Happens to Your Yard During This Process
Trenchless work typically leaves the surface pretty much as it was. Instead of a long trench, you have one or two small excavation points, and established landscaping, driveways, and mature trees along the path of the pipe are usually left undisturbed. Any open ground is backfilled and usually ready to reseed soon after, rather than waiting months for regrowth.
How Long Does Trenchless Sewer Repair Actually Take?
So how does trenchless sewer repair work on a timeline homeowners can actually plan around? Most single-line residential repairs, inspections, access setups, and bursting or lining will be completed in one day. That can reach more than one section of the pipeline, but trenchless jobs are usually measured in days, not the week-plus full excavation tends to require. Trenchless sewer repair cost depends on the pipe’s length and condition and the method needed, which is why the camera inspection is also when homeowners get a specific, accurate picture of what their repair actually involves, not a generic estimate.
Catching It Early Is What Keeps the Repair Small
Understanding the trenchless sewer repair process- camera inspection, access points, then either pipe bursting or CIPP lining, followed by testing makes it clear why acting on early warning signs matters more than most homeowners realize. A cracked line only gets worse with time, and what starts as a slow drain can turn into sewage backup, saturated soil, and a far more disruptive repair if it’s left alone.
At Herdman Plumbing Heating & Cooling, this is the process our technicians follow on every sewer repair call throughout Kitsap County, including Silverdale, Bremerton, Poulsbo, Port Orchard, and Bainbridge Island. We lead with a camera inspection on every job because it’s the only reliable way to know whether a line needs bursting, lining, or a smaller targeted fix.
If your drains are running slow, your yard has an odd damp patch, or something just smells off outside, don’t wait for it to turn into a backup. Call 360-698-4147 to get a diagnostic inspection scheduled with our team.